")

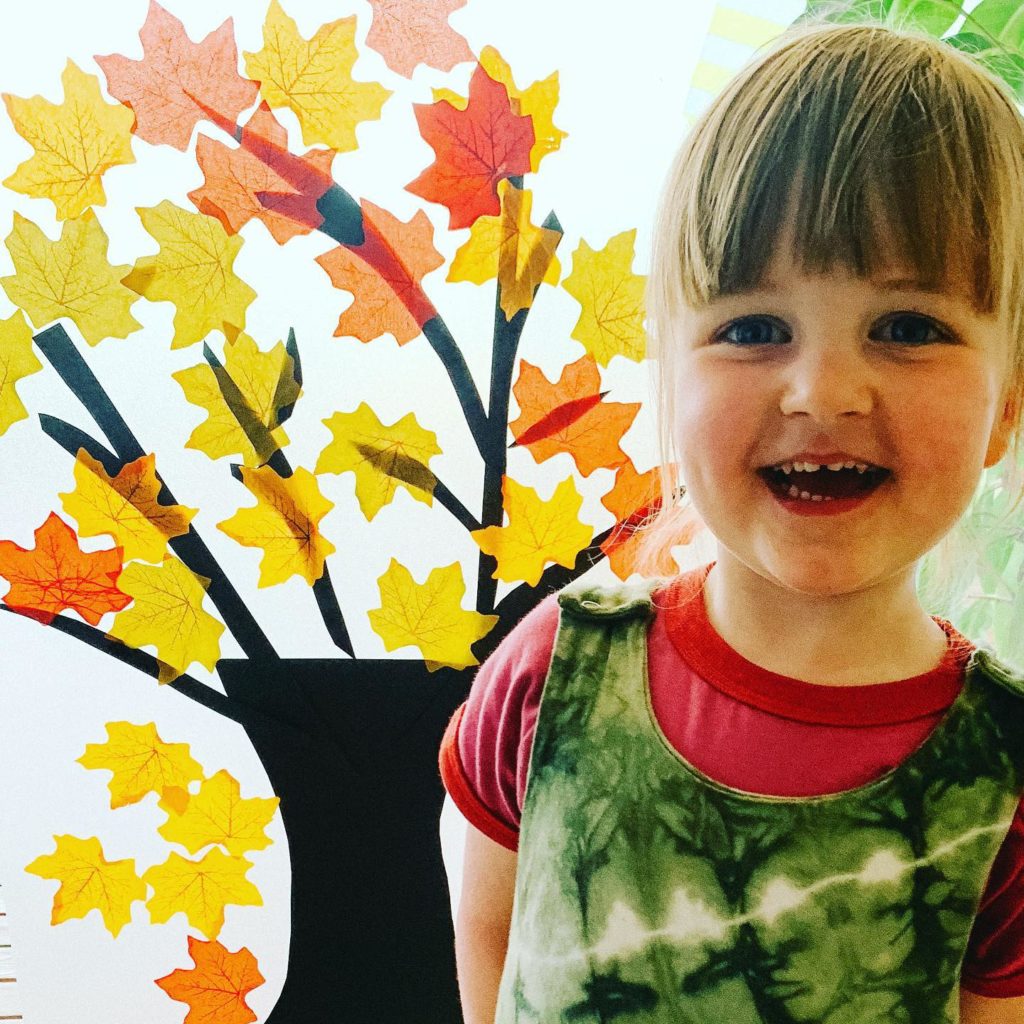
The leaves are beginning to slowly change colour, which can mean only one thing, autumn is on it’s way!
Autumn is the season of colour, and by far my favourite. I remember I used to go out of my way to step on a crunchy leaf, and for some reason it still brings out the child in me!
These activities have been created with young children and preschoolers in mind, but they’re equally as satisfying for older age groups too (ahem, even really big kids at heart!). They’re easy and quick to put together and especially great for keeping those toddlers busy while you get something else done, or better yet, sit down and have a cuppa, or read that magazine you bought three weeks ago that’s still sitting on the kitchen counter!
Contact Art
You will need:
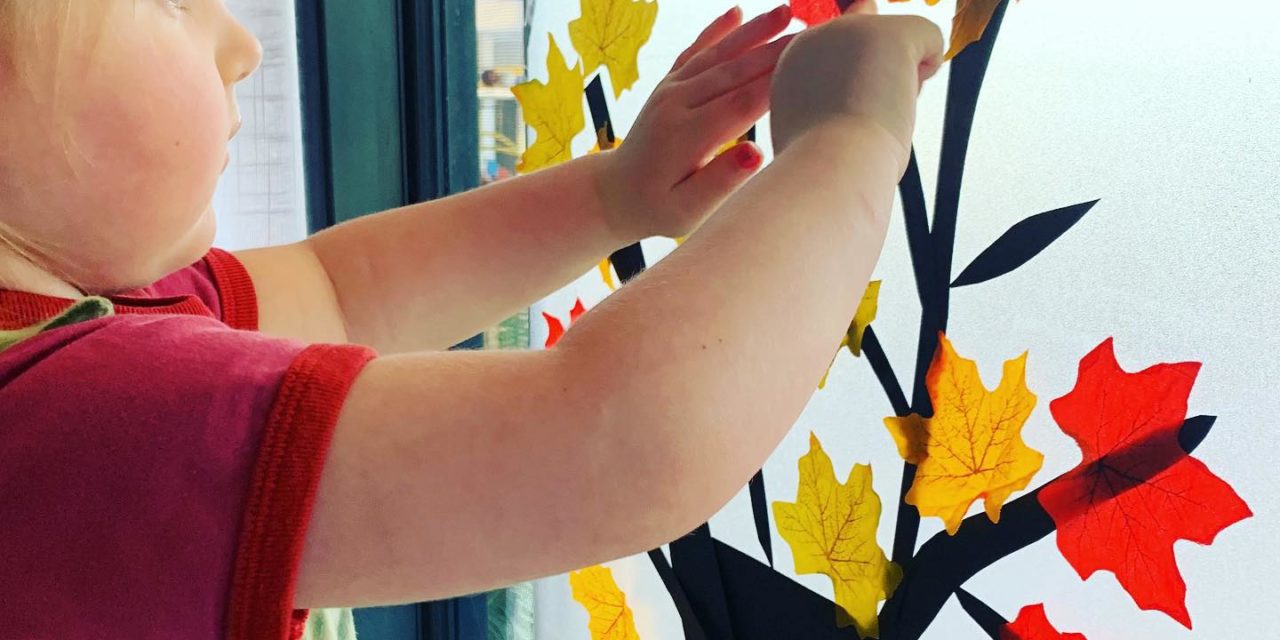
- Clear contact
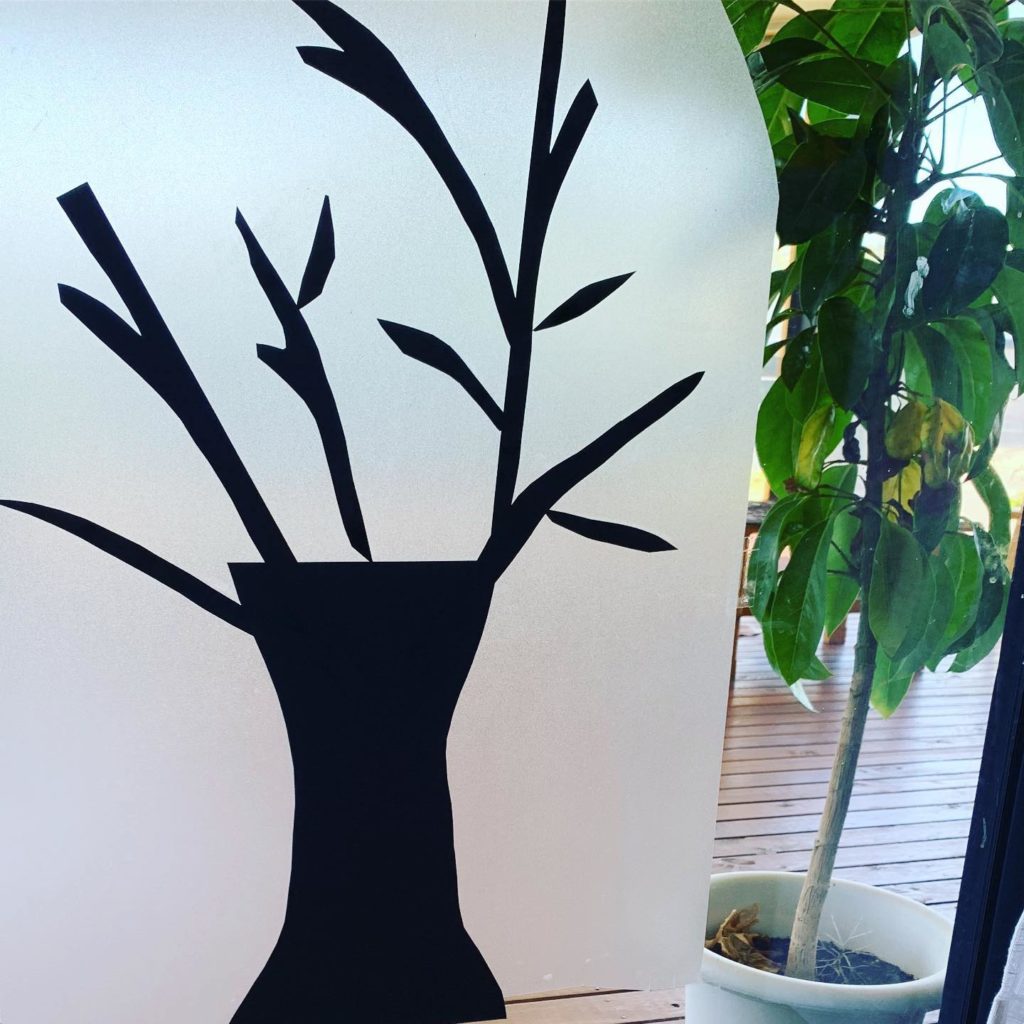
- Black card or brown paper, cut into a trunk and then some branch shapes.
- Homemade leaves (you could pre paint/fingerpaint some autumn colours with your child and cut it into leaf shapes)
- Or craft leaves from a variety shop
- Sticky tape
To begin… Cut some contact off the roll and round off the top. Then pull off the paper backing. Stick this (with the sticky side of the contact facing outwards) to a window, wall or sliding door with sticky tape on the edges (you’ll only need a little.) Press on the trunk and branches!
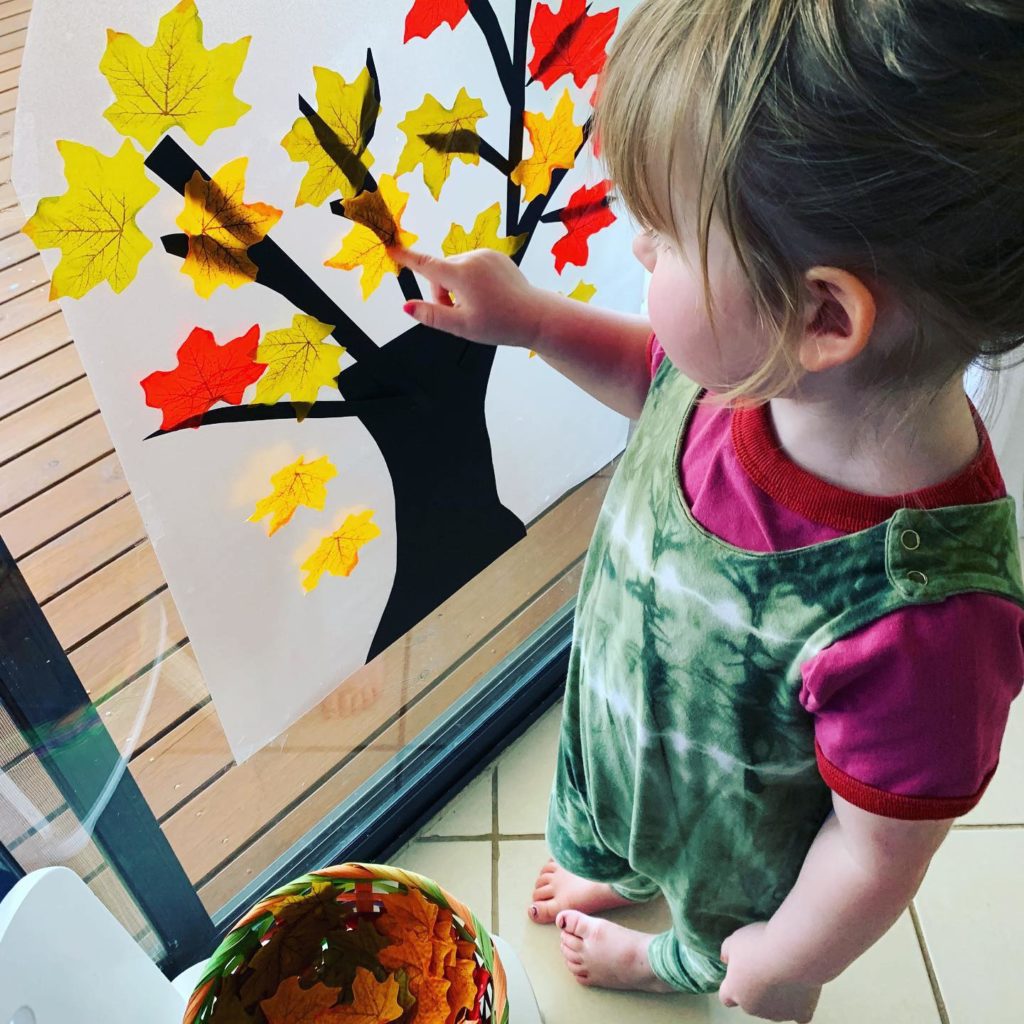
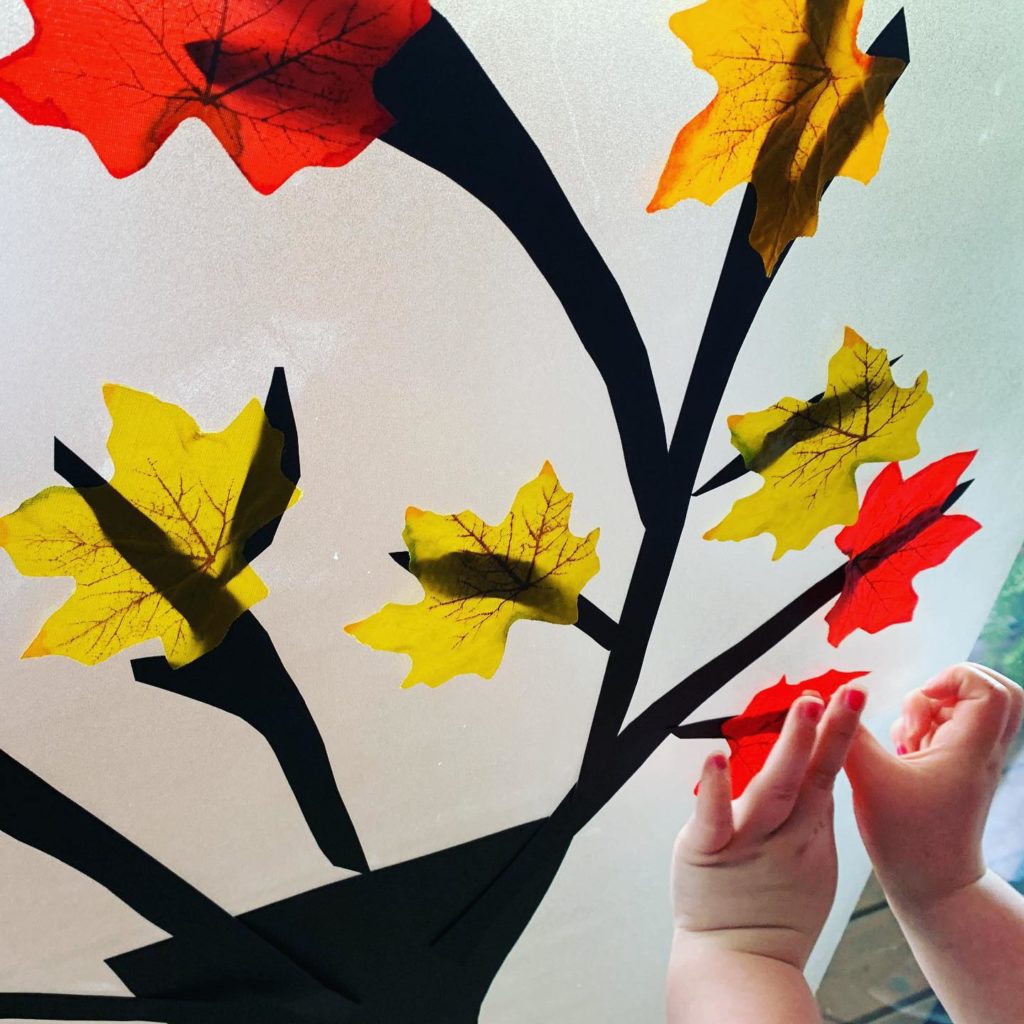
Pop the leaves in a bowl and let your child enjoy adding them to the tree!
This activity is very easily adapted for other themes! You could make a basket instead of a tree and decorate with homemade cardboard glitter eggs for Easter, or a Christmas tree with round painted baubles or even a snowman made with cotton balls!
I found the autumn tree worked a charm, our leaves even fell off a few times which made it look like a real tree dropping leaves!
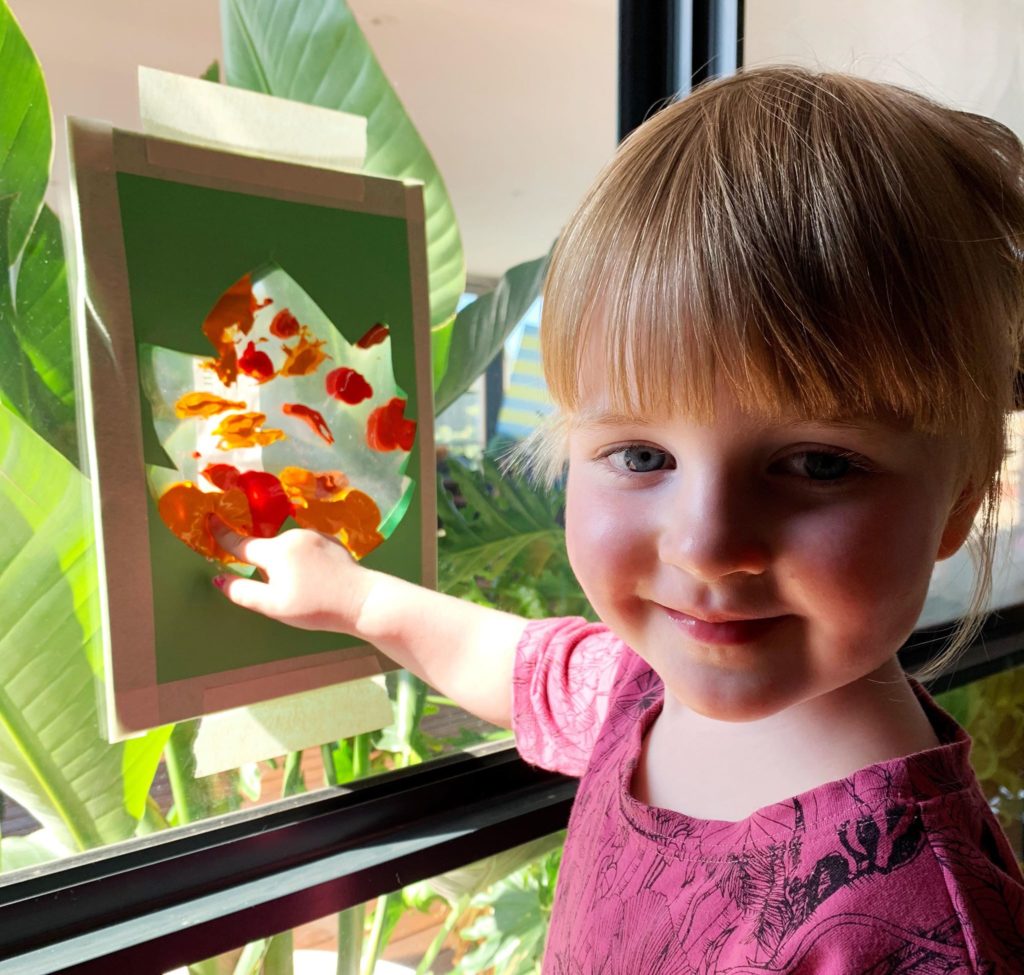
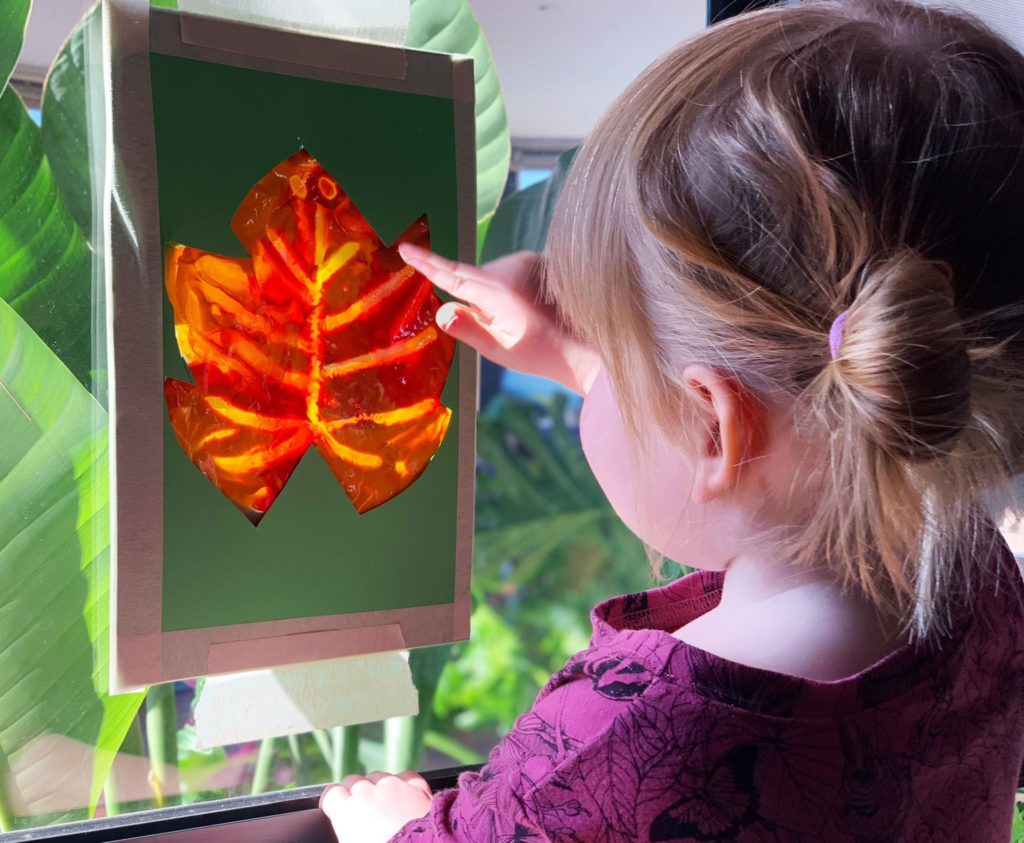
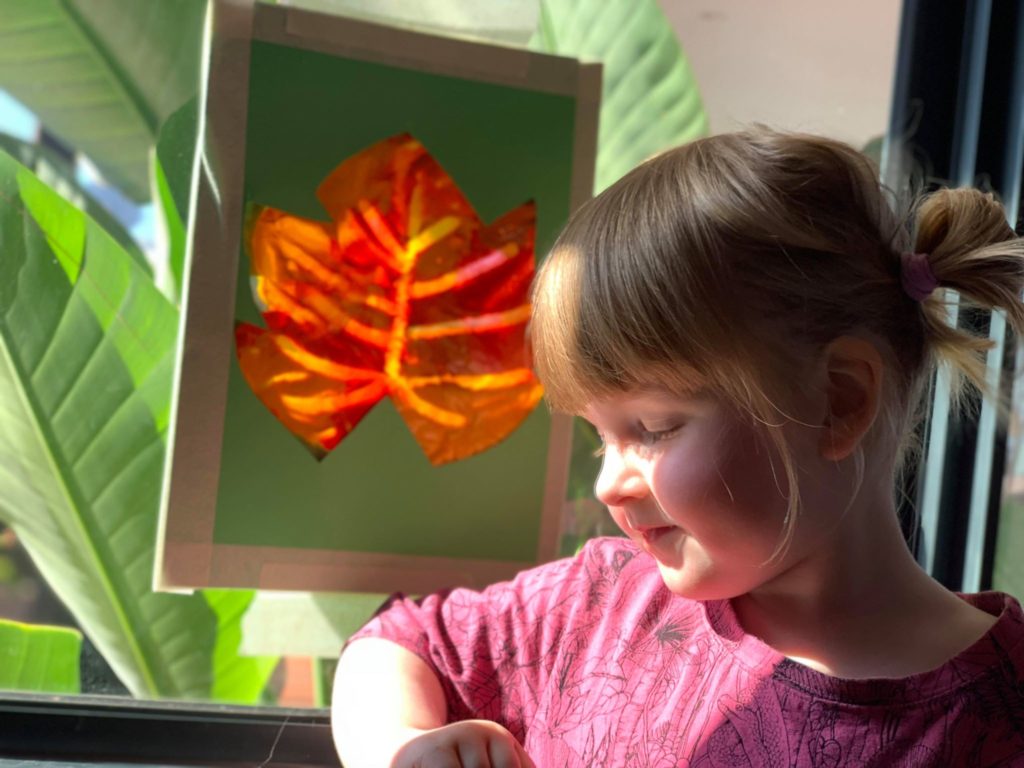

Sensory Zip Lock Art
You will need:
- Two pieces of coloured card
- One zip lock bag
- Sticky tape
- Red, Yellow, Orange and Brown paint
To begin…
- Trace around a large leaf or freedraw and cut out the two pieces of card, so that they are the same. It’s easiest to cut one and use that as a template for the other.
- Place small squirts of each paint colour in the zip lock bag and zip it shut.
- Place the bag in between the two pieces of card and tape the edges.
- Attach to a window with tape at the top and bottom.
Watch as your little one discovers the joy of mess free painting!
This activity can also be adapted to different themes. Easter eggs, trees, stars, suns, moons… the ideas are endless!
HOT TIP: For crawlers, this is a brilliant activity to tape to the floor or high chair!
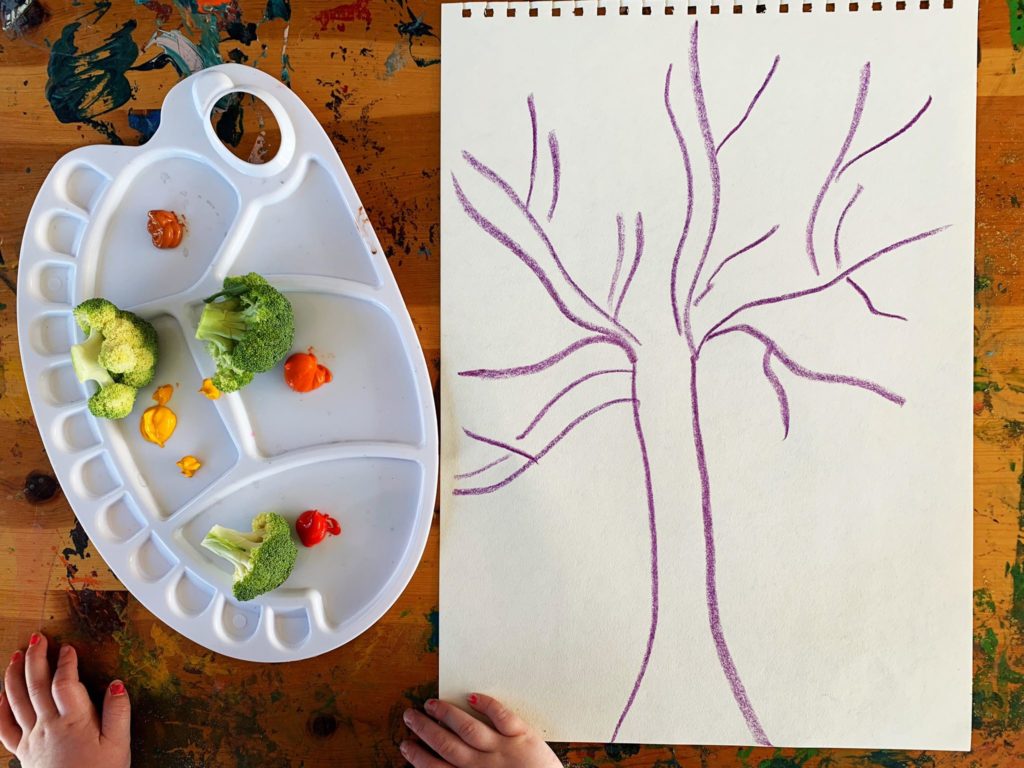
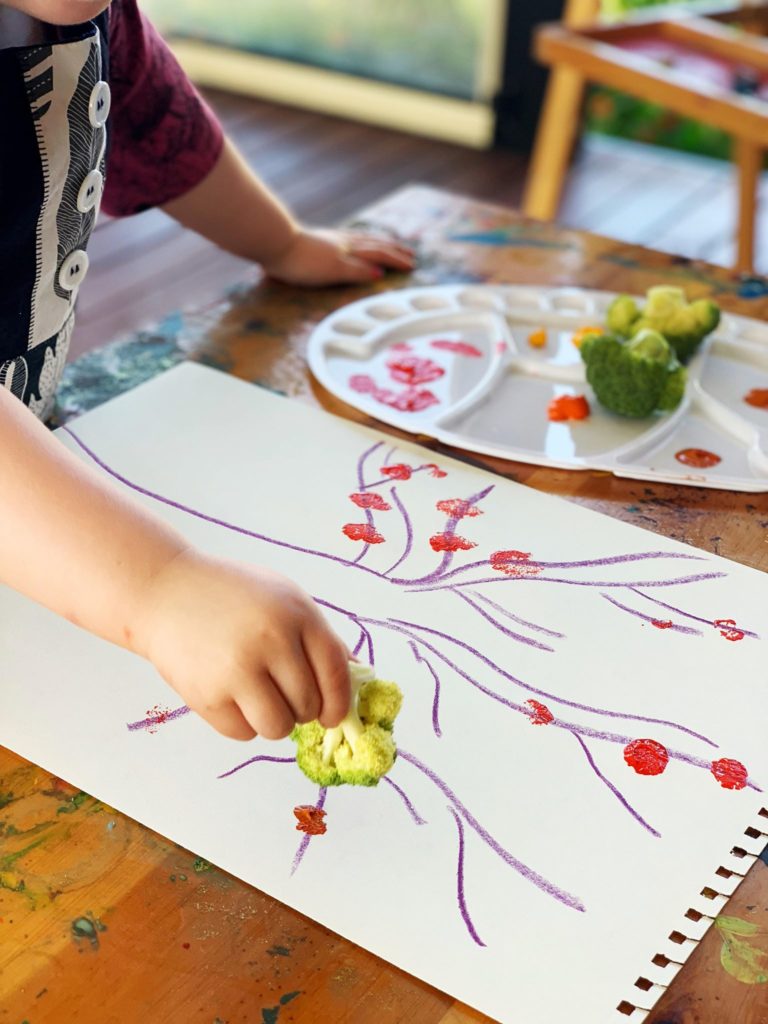
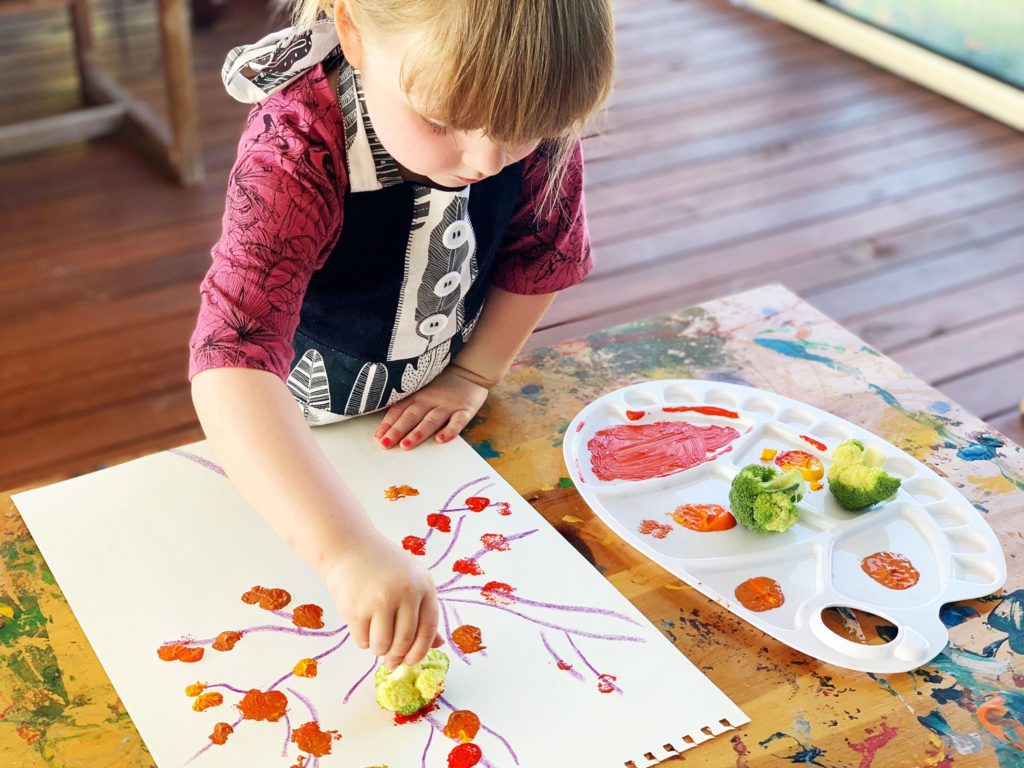
Broccoli Leaves
Every child loves to stamp, and for some reason using vegetables or fruit makes it extra fun! This activity is extremely quick to set up and will bring you much needed quiet time as your child enters that relaxation ‘zen’ mode whilst they paint! Bliss! Beware! It could get messy, so it’s a great one to do before a bath!
You will need:
- Large piece of paper
- Red, Yellow, Orange, Brown paint
- Broccoli
- Pencil or texta
The only prep required is to pop the paint on a paper plate or a palette (if you have one) Draw the tree trunk and branches. Then chop up the broccoli!
You may need to do a quick little demo to explain the activity to your child! Just dip the broccoli in the paint and add the pretty leaves to the tree!
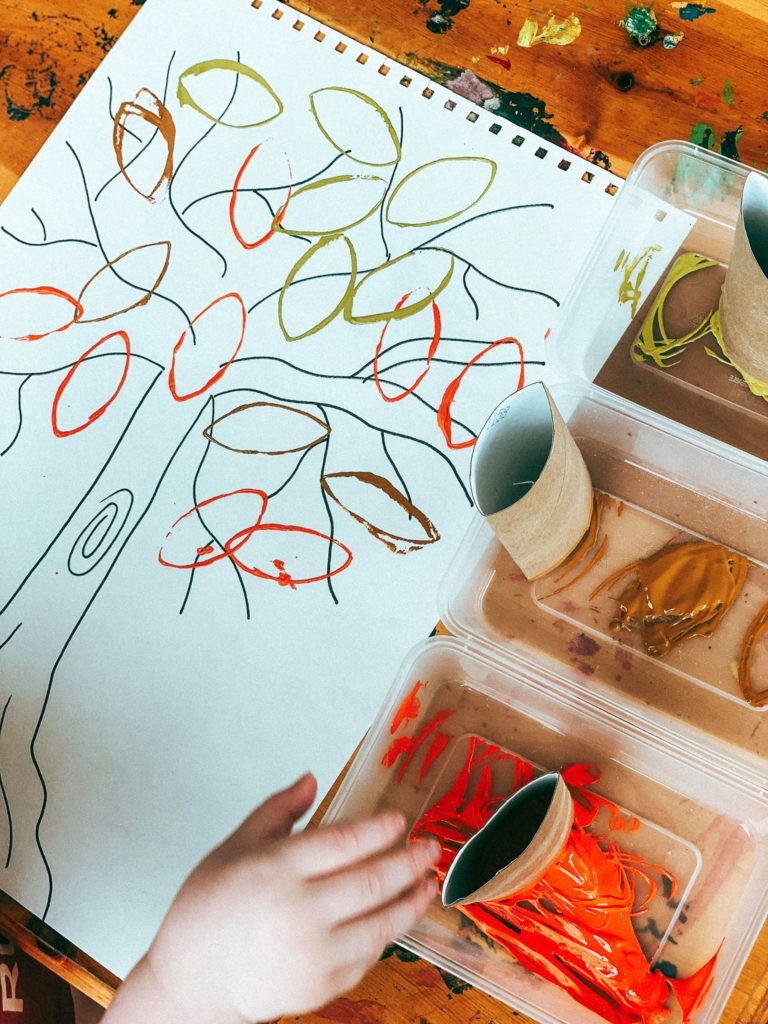
Adaptation: If you don’t have broccoli you could also use cue tips, bubblewrap, fingerprints, toilet roll ends squashed into a leaf shape, flowers, cotton ball paintbrushes (cotton balls held by a peg)
You might also be interested in
-

Here are a couple of quick and easy art activities inspired by Winter. SNOWFLAKE DECORATIONS You will need: PaperScissors Method: Start with a square. Fold in half to make a triangle, then fold the points upwards (check picture for reference) Then draw the snowflake design and cut out! Make a few in different sizes and decorate a wall or door! SNOWMAN SURPRISE You will need: Clear contactScissorsColoured card (or an old cereal packet you can cut up and colour)Either old lace doily from an op shop, cotton balls or white paper Method: This one is really simple but kept my three year old entertained for quite some time and she was thrilled with the result. Simply draw the snowman shape on the contact. Cut out and peel off backing. Stick to door or wall by folding over a couple of centimeters at the top and bottom. Let your child decide what accessories the snowman will have. If they can draw and cut them out by themselves, give them ownership of their artwork. My three year old drew the circle buttons, the lines on the carrot and the shape of his smile and I cut them out for her.
-

It's not often my family can go out for dinner and truly not able to finish another bite, but that is exactly what happened at The Bavarian TTP. We popped in to try out their new $49 Feed the Family Deal (available daily before 6pm) and it was sensational! This wasn’t a bucket of nuggets trash meal either, this was high quality German-inspired fare with a great variety to satisfy even the fussiest of eaters. (great beers too just quietly with the steins on point!) This share-style deal is designed for two adults and two children under 12 and begins with a plate of huge salted pretzels that were well received by my fussy clan. The main course of what seemed like an unlimited amount of chicken schnitzels with mushroom sauce (we couldn’t eat them all and we have a family of 5!), fantastic salad (again it felt like it was served in a cauldron....so much food!) and a big bowl of chips to finish off the meal. Oh and don’t forget dessert! Save some room for a great little apple strudel for the adults and ice cream for the kids. The regular menu has lots of options including burgers,…
-

Ultimately, we want our children to love to learn. A passion for learning is quite different from just studying to earn a grade or to please parents or teachers. Those who develop a love of learning at an early age continue the process throughout their lives and are generally more successful, interesting, and happier than those who don't. Realising that the one thing that we give our children that no one can take away, is their education, maybe we should take more care to engender this love of learning that will lead to their ultimate success. The following points are a collection of tips and tricks collected over the years and put together to help as a guide to encourage a love of learning. Have fun as you work to implement them in your family. Show that you’re a learner too Share things you have learnt. Tell your children about Professional Development and Conferences you attend. Invite their opinions on things you have read for your own interest. Never talk down to them. Be part of the learning community. Encourage creativity Give children opportunities to create in any way they like. Have them create original expressions of their learning through…